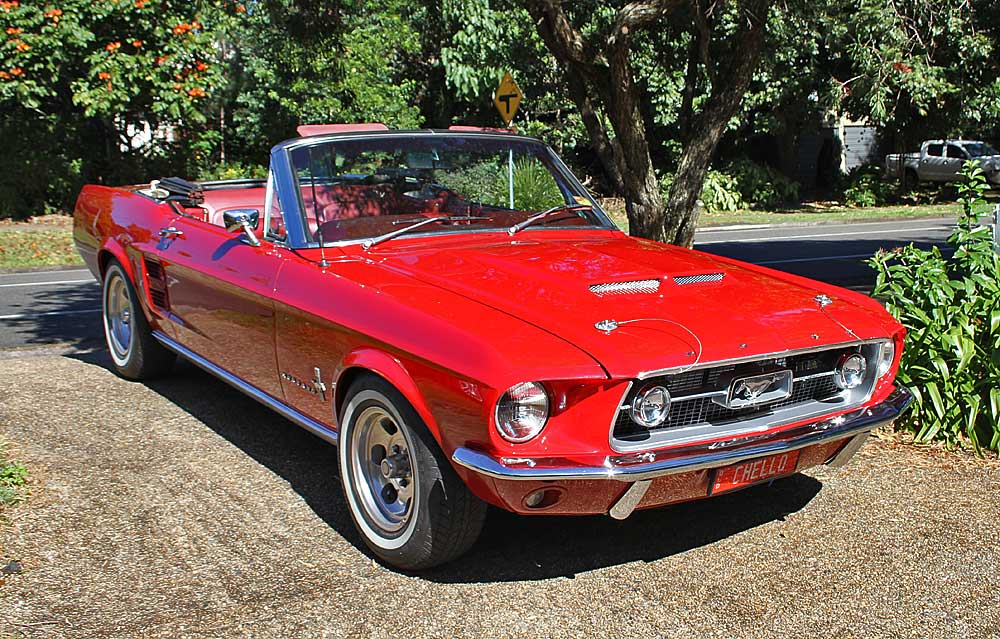
Sunday, 22 January 2012

Fire and ICE


Decided to give the Austang a new ignition system for Christmas, the Petronix unit being a bit basic. Have been reading up on these ubeaut ICE systems, made in Australia.

They are a hybrid that uses a computer to vary the timing, dwell angle, length and intensity of the spark at different revs. Sounds like just the thing, so I contacts the dude in Melbourne and he sends up the boxes.
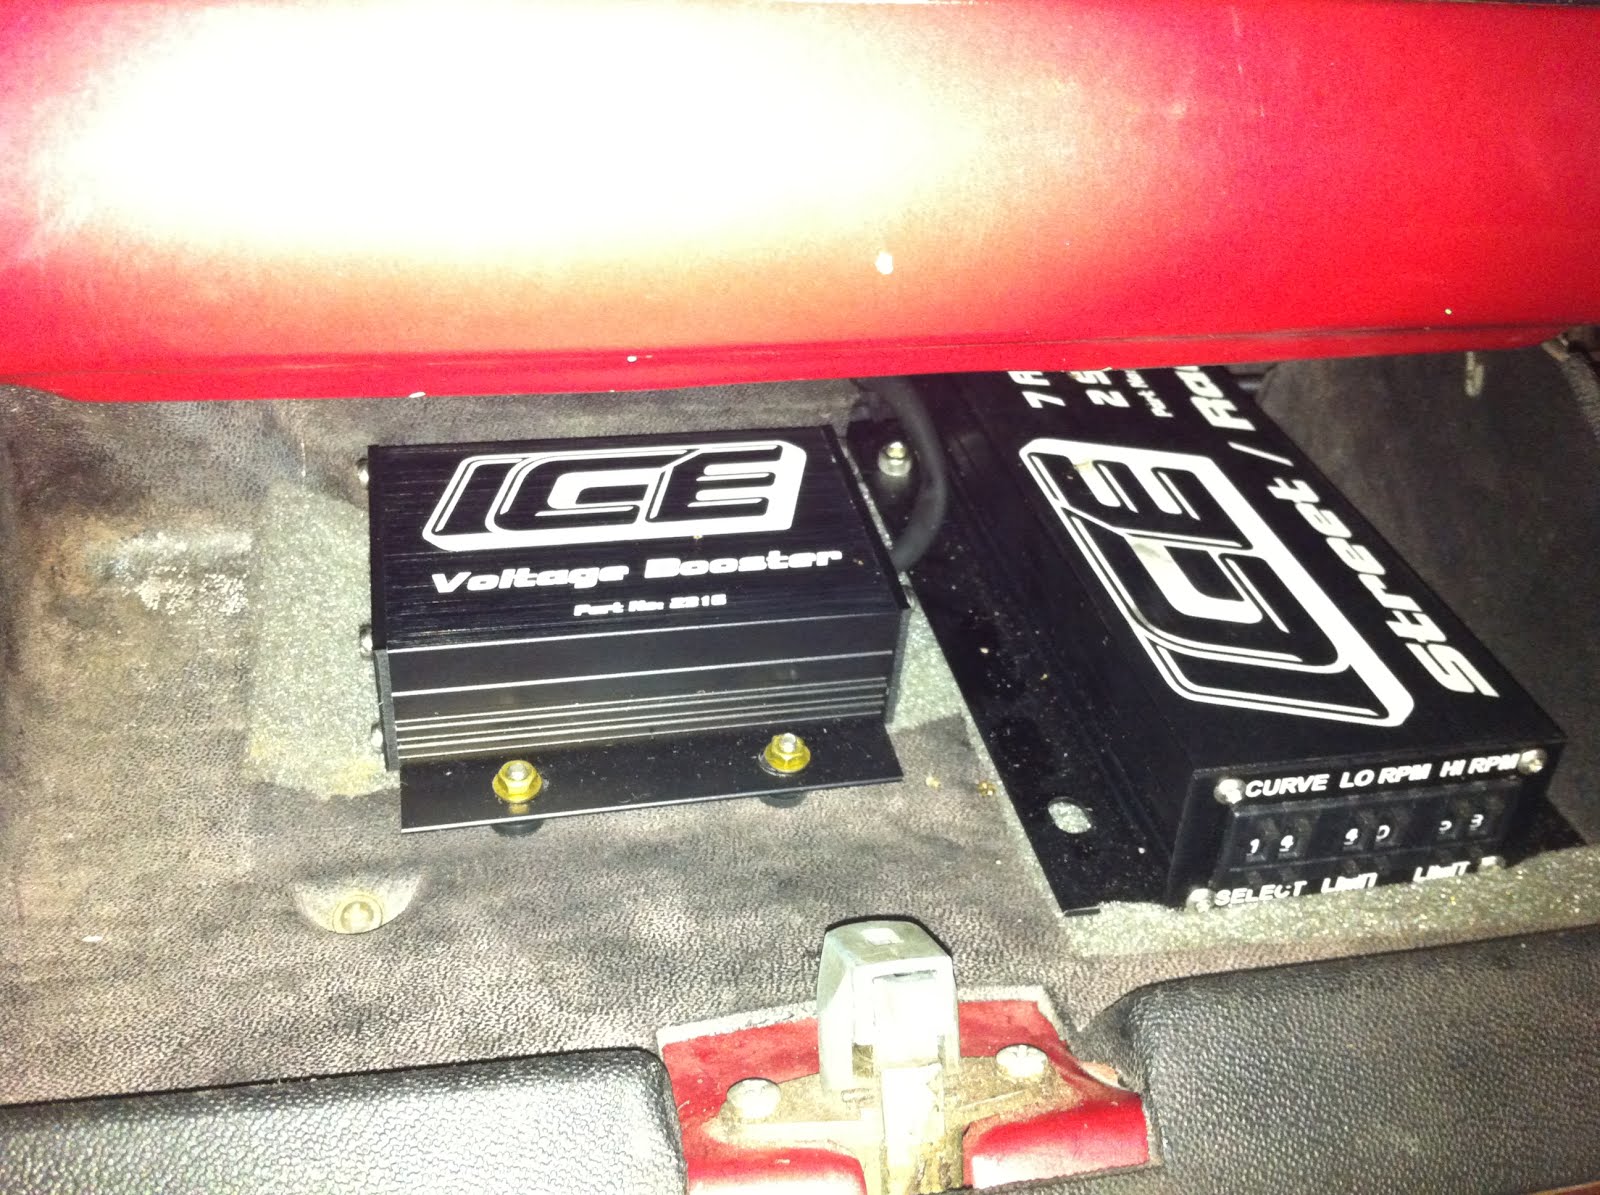
Pulling the stuff out, I find a distributor, leads, connectors, wire, the black box and a special booster which pokes the volts up, to ensure a steady voltage at the coil primary. This latter device is mainly for boats or drag cars without alternators etc. , which rely on the battery to maintain the volts at the primary. I figured that with all the sound gear, cdi lighting etc. I could justify spending the extra. Really, I just liked the idea of having the extra poke!

During conversations with Michael, the company owner I mentioned the wild cam and how I had dialed it back after the last blow up, to restore drive-ability. He told me that if we had installed the ICE system in the first place, I could have kept the wild cam as it adjusts the spark to give a better burn at idle and I am able to set initial timing higher to compensate the big overlap at idle.

Well I had heard promises from people before and took it all with a grain of salt.

I set to installing the black boxes and running the wiring. Decided to put the computer in the glovebox as suggested on their website, that way I can alter the timing curve quickly and easily. The biggest drama was finding the ignition only wire to send a good ignition switched 12V to the ICE computer box . . . last thing I wanted was an accessory feed going to the electronics. The only answer was to pull out the whole dashboard and trace the wire manually back to the switch. The wires were "grotty as" and the wiring diagram confusing in the manual. Just to be sure I had the right wire, I pulled out the switch and using a meter, determined exactly how the switch worked. There was the big thick wire heading off to the coil . . . splice into that, solder and tape up and Bob's your uncle right?

WRONG! put the dash back together, straining neck and back, swearing at the bloody speedo cable not wanting to go back in and the multi plug which you cannot get a proper grip on.
Popped in the new Dizzy, checking and triple checking the mesh of the cam gear and alignment of the rotor button.

Hit the starter and vroom! It started first go. But after a 30 second idle, piles of smoke poured out from the dash. stuck my head under and could see the insulation had melted off the wire from the splice back to the ignition switch. HUH? there are no shorts and quite frankly you would expect the insulation to be burnt off the whole wire, not just from the splice back to the switch, a distance of about an inch.

Out comes the dash . . . let's have another look at it. Luckily, I switched off before the hot wire did any further damage to other wires or the switch. WTF? I thought, this does not make any sense, it is like there is a big resistance in the wire from the switch to the splice. A big resistance, oh yeah, they used to make the wire to the coil a resistor wire to drop the volts to about 6 volts to avoid burning points didn't they? Another scan of the wiring diagram and I see the funny squiggle beside the wire number and realise it is the sign of a resistor. The ICE system was pulling so much current that it generated massive heat in the small area of the resistor, to which I had spliced. So a quick splice into the other wire going into that same point on the switch (which apparently the Racecraft guys had used for the Petronix system) and all was sorted.

Next challenge was massive preignition every time I drove and put revs on the car. Another WTF moment, I had checked the timing, all seemed to be correct. Took it to a mechanic and he discovered that the calibration on the pulley was not correct, another mark on the balancer had been dobbed with paint and that was the 0 degree point. Reset the timing and all is great.

Now, back to Michael's promises about the performance. He is right! The car used to take forever to start when cold, now fires almost instantly. When warmed up, the engine starts with key only. The idle has improved out of sight and it runs amazingly well. I wish I had the beasty cam back in there!

The ignition leads are all a bit short as I route them for show through fancy trays. But he is cool, just send them back with lengths for new ones and he will replace. Cannot ask for better service than that!

Installation paperwork and info on the curves is a bit sparse but I expect the real answers lie in putting the car on a dyno and setting it up under load in a controlled environment.

Apparently these things kick the MSD offerings out of the park, not a lot of info on the internet about them though and listening to the yanks talk, they like the MSD stuff because they made it. In fact one of the guys on a forum said that "made in Australia" means "Made in China". Ignorant jerk he is! They should take a look and what ignition system the top winning drag racers are using.

Monday, 2 January 2012

Ride the Wild Pony

pretty as a picture!


The Sunshine Coast is a seriously beautiful part of Oz . . . in fact when people say "Oh I think such and such is the place to live" I say "So you haven't been to the Sunshine Coast then?"

Took this up the Hunchy Road on the way to Montville after getting the lifters and cam repaired.

Broken valve train


It's been a while since anything was posted here, yet the story of the Austang rolls on . . .

Some time ago late last year, the engine gave a little burp in traffic and then started with the metallic clicking sounds. Oh dear! Quickly getting off the road it first sounded terrible, and then got a little better. So I opted to baby it to the mechanic.

Checked out and found no comp in number 7. Turned out to be a broken valve spring in the Edelbrock Head.

Contacted the Engine Factory and was told it was out of warranty . . . but they did send me a new valve spring, push rod and roller rockers. Pretty good response from them all things considered. The rollers were of a different brand but we just fitted the springs in and new push rod.

About a fortnight later more drama, while idling in the driveway, there appeared a really bad metallic noise with lots of ugly click-clack valve-train noise. Towed the car to the mechanic who discovered upon pulling off the inlet manifold . . . one of the lifters had destroyed itself. Further investigation found that two other lifters had released the pin holding the cam roller and one in fact had popped out and jammed the lifter in the bore, making it hard to remove.

The cam was of course, totally stuffed.

Another communication with the Engine Factory and they were all gob-smacked. Told me the lifters are all Elgin brand and American not asian knock offs. Said they are made in one of three US factories and each brand simply boxes them up and resells. He said that this was the first of this thing ever happening . . . Needless to say I was pissed!

He was right about the roller lifters, the replacements I bought were Federal Mogul brand and looked identical to the old ones, in fact there was so little wear on the originals, you had to be careful not to confuse them with the newbies.

Bruce at The Engine Factory asked to have the lifters sent so they can analyse . . . in the meantime he noticed the brand of the lifters were a brand they used for a while but stopped using, going back to Comps. So he sent over a new set of Comp Roller Rockers, kind of a consolation prize I guess. Once again, they seemed very concerned and this replace rollers was very much unexpected, but gratefully accepted.

So after $2500 the Austang was repaired with a new Lunati roller cam, but much milder than the original (which never really worked well with the auto trans).

Saturday, 26 March 2011

She really flies!


A recent landmark birthday saw me flying a P51 (actually a Commonwealth Aircraft Company variant) at Caboolture. What a total buzz and a childhood dream accomplishment!

The Mustang with wings is a hotrod of the skies, with the superb inverted V12 Merlin Rolls Royce crackling us across the wild blue in real style. Wing overs with high G pull outs, shooting up the airfield, man o man it was mind blowing.

Afterwards the guys let me park my 'stang with it to snap out some photos. I did this once before at an airshow about ten years ago. The Austang has undergone massive changes since then so it was interesting to compare the two pics.

Steering straight


The Austang uses an Australian power rack and pinion steering set up. I have not really expanded on the stuff I wrote earlier, now that we have tweaked and poked it, I suppose this is as good a time as any to give a report.

The ad in "Street Machine" said the rack would end bump steer. When we put it in place, that claim was clearly a bit of an inexactitude! The Racecraft guys had to reinforce the mount and alter the height of the forward mounting point to ensure equal movement and tracking over bumps.

But don't think I am bagging the unit! It has worked flawlessly and is a high quality piece of kit, worthy of any street machine.

We had challenges with the unis and the angle of the steering column, which caused the steering to bind slightly at 12 o'clock. The guys at RRS were very helpful in this regard and offered advice which enabled us to fix the problems.

Now George has sorted the freeplay in the collapsible steering column, the whole thing steers very well.

Looking back at the challenge I can offer this advice to anyone contemplating the addition of a power rack and pinion set up.

Firstly get an engineer to do it! Although you might have a mechanical aptitude and a good tool shed, this is serious work that needs first class mechanical work.

Secondly the instructions about the angle between the steering column and the unis appears to be absolutely critical for good operation. This info was sadly lacking in the instructions of my unit and perhaps it is something the guys at RRS should address. Make sure you discuss it with the people selling you the unit before you buy. If you can't get this right, you will not be happy.

Finally, the power steering is very light and means you have to be careful at speed with the unit installed. Not a big issue, just that if you (like me) are used to driving the car with manual steering, a serious adjustment to your concentration and style is required, while you get used to the effortless power set up.

Now I am used to the steering and the set up is finally correct, the judgement comes down that the RRS rack was a good choice.

Wednesday, 23 March 2011

Mustang Dreaming

Went for a ride down via Sandgate and shot some pics . . .


Saturday, 26 February 2011

Rocking new alloys


The need for a new set of tyres for the Austang got me to thinking . . . the beast really needs a great set of new wheels that suit the lowered profile of the car. So I thought "Why not a set of 18" rims?"

They had to be something which looked old school but new tech. Here is the sweet result, a set of polished alloys, 8" at the back and 7"s on the front. Nice dish and a real old hot rod feel.

The low profile tyres give the car a real solid feel on the road. I have not given it a bootful to smoke them yet . . . they cost too much to spread all over the road . . . but they certainly have tamed the traction monster, gauging from the driving so far.


I shot this vid on my iPhone, funny, it made the car look pink!

Goodbye faithful old wheels, now I better get you onto ebay!

Wednesday, 23 June 2010

Pretty Pony with the heart of a Beast!


The Austang is back home with all the bits in place!
Bottom line is at the top . . . George May of Racecraft in Kunda Park has done a great job.

The journey has been emotional and I have endured highs and lows in the process, the lowest of which is the crap work done by the exhaust guy. If you want a personal report, drop me a comment and I will fill you in. After spending $1500 with that clown and having all brackets break from the strain, the whole thing has since been rebuilt for half the original cost and now does not bang on anything, even with a full load of people. Plus there are no leaks through parrot-shit welds! Honestly, I would not let them work on my wheel barrow.

Heads up, if you want a great job done on your exhaust, go to Steve at Kuluin Mufflers.


The Camshaft is very lumpy and probably a bit marginal for an auto tranny but makes big HP and a great sound.

Got a little issue with the Rack and pinion steering by RRS, there is a little play in the uni joints which causes the steering to lose it for a couple of degrees in the middle. I am currently talking to them about getting a replacement set.

Here's a little video of the first drive, the belt is a bit noisy and I need to deal with that . . .

Sunday, 16 May 2010

Straightening out the Rack

The You-beaut RHD rack and pinion steering setup from RRS went in without a hitch, but the claim it would stop bumpsteer was just bullshit.

We had to modify the front arm height to ensure it aligned with the rear. Otherwise the tracks were not going to be anything near correct!

Now at least the beast really will steer without spreading her wheels on the bumps.

Will be great to steer around the carpark with power again. The guy who did the RHD conversion talked me into not putting power steering back in. Probably because he just didn't want to go through the hassle of setting it up.

With this stuff in place I am expecting it to steer like a Ferrari and handle less like a jelly fish. Still have to replace the sway bars etc, but lets just see if there is any money left when all this stuff is in!

Looking at the greasy side . . .


(click any image to see it in a larger form - hit back button to return)

This shot gives a good look at the fitting of the now shortened and rebalanced tailshaft. You can also see the remade LH exhaust pipes, made to point straight back, to avoid hitting the tranny.

The Automatic Overdrive Box as supplied by Monster Transmissions arrived as an impressive and comprehensive box of kit.

However it did not just bolt in, despite the AOD cross member and mounting hardware. The box just would not go into the hump without a little modification to the floorpan. There was no need for cutting, they just beat it with a hammer (the floor pan that is ) in a few judicious points and it eventually bolted up in place.


The next little issue is with the fitment of the B&M shifter, which necessitated the inversion of the shift lever/linkage.

That was easy enough but caused the LH extractor collector to interfere with the box and the mechanism.

So the pipes were cut and collector removed. A new set of pipes made and repositioned to go back on the extractors, turned away from the AOD. The collector is yet to be put back in place.

Pity the lovely black paint was scratched away from the bottom of the tranny will it was being put up and down.


The ubiquitous Ford 9" differential now graces the rear end! 3.5:1 gearing and the overdrive should see quick starts at traffic lights and low revs on the highway.

With the car up like this I finally got to see why the exhaust banged on something whenever we go over a decent bump with a load or low air in the pump up shocks.
The dumb b@3t@rd$ that fitted the exhaust in Newcastle way back, just mounted it too far back. If they had just made their brackets an inch more forward, it would miss all the undercarriage and never have been a problem.
We had always figured (and blamed) the leaky air shocks for being the issue. I must have spent a small fortune ever the years, paying morons who claim to be trade experts, to do crap work.
Because the thing is, I am quite capable of doing my own shoddy work without expert help!

As you can see the air shocks are history and are replaced with good quality standard shocks from (of all things) a landcruiser! They have lots of travel and are good beefy support for the rear end.

Work Continues

The engine bay has been painted the same red as the body, looks pretty good in high glossy duco rather than the ugly matt (and oil stained) black finish. The wiring has been rerun under the guards so it is hidden from view.


New shocks were fitted and the springs shortened to give a better ride and a muscle car stance. Truth is, it did look a bit like a missile launcher with the tail down and nose up.

The extractors have been modded to line up the pipes with the exhaust ports in the aluminium heads. The odd thing is that the exhaust ports are not the same as the original windsor heads and do not line up. So George has modified the extractor pipes by welding material in place and then ground out the pipes to line up more closely. In his words, this is not the best arrangement but in view of his guess of $2000 (which is probably a fair enough price but outside my budget) to build a set of custom made pipes, it will have to do for now.

The exhaust down the left side caused another challenge when the new AOD went in. The pipes had to be cut, the collector removed and a new set of pipes made which turned away from the tranny. More on that later.


The main components are in place, now it is just the "fiddly bits" left to do before we get the tranny adjusted, new exhaust system made/fitted and fire up the motor.

Tuesday, 20 April 2010

Retiring the 289


Well, here's the old donk!
A sweet genuine old school 289 ci Windsor. I was told by an American dude we met at a drag race meet in Alice Springs, that these old blocks are great for stroking because they are stronger.

Hmmm my new stroker is a '93 block . . . hope he is wrong. LOL

austang is getting a new heart (and lungs, liver and other organs)


We put the car into the hands of George May of Racecraft in Kunda Park. He was straight about the prices and didn't want me to write him a blank cheque like the other crowd (who shall remain nameless)!

The motor was pulled out, C4 and Mustang diff all removed without ceremony. Now they are all living in my garage, while I think about what to do with them.

In their place is a great new 3.5:1 9" diff, AOD tranny and of course the awesome 347 from the Engine Factory.

Today I bought a new B&M Megashifter to give some racing control over the AOD.

Geo suggested I get the engine bay painted the same colour as the body and have all the wiring hidden. I agreed, so he has filled all the holes, taken out the piece of crap alarm installed by a mob insisted on by Shannons Insurance. You should have seen the quality of the connections they made!

On top of it, I scored a set of HID lights for it, so we will now be able to see at night!

Oh yeah, also have bought an RSS rack and pinion power steering set up, to replace the hybrid falcon/mustang set up. It looks like this . . .

Tuesday, 26 January 2010

The 347 is here!

Last September I ordered a roller cam 302, stroked to a 347ci with lots of go fast stuff on it, rated at 450 horsepower. The people charged with freighting it over stuffed up the transport and it has arrived 2 months late.

The idea is to build up a street machine, with the hot donk, a hard AOD trnsmission and a 9" diff with a locker and 3.55 gears. Should be a sweet beast! Now the engine has arrived but I am yet to order the rest of it, because I was worried the motor had been stolen or I had been ripped off.

Well it has arrived, the thing looks amazing and now I have to pull my finger out and get the rest of the gear organised.
Here's the video the engine builder made for me

Australia Day Buderim 2010


Brilliant blue skies launched a scorcher of an Australia Day on Buderim, nice and early we prepared for the big parade down the main drag.

Shano donned the Kookaburra suit to play the part of Buddee, the mascot of the Buderim Web Site. Riding in the back with a cartoon speech bubble style sign which told the crowd who/what he was . . . he waved to the cheering flag wavers as the Mustang revved and seared on the boiling bitumen.

Ambient temperature was in the mid thirties, a home made ice vest kept the mascot's internal character cool(ish), the poor 289 was sitting quite high in the guage, but kept steady.

Sunday, 23 August 2009

Ponies in the Mountains


The Blackall Range in the Sunshine Coast Hinterland is a beautiful place. Perfect for running the Pony in fresh air and winding roads.


Today we took a ride up past wita behind Maleny and discovered glorious views and absolute peace and quiet.


Took a few snaps of the beast with the mountain backdrop then came across some Clydesdales who seemed really interested in our Pony ;-)
More than one pony under that hood!

Tuesday, 11 August 2009

Mustang Restorations Project Tail Lights for 67 Convertible

The quality of this video is not so good, but you get to see the way the LED Tail Lights work on the 67 Mustang convertible.

If anyone runs up the bum of the Austang, they're just frigging blind!

Sunday, 9 August 2009

Red Pony in a rural setting


Up on the Blackall Range in the Sunshine Coast hinterland


Take a ride down the range in a convertible 67 Mustang!


Saturday, 8 August 2009

Putting Aussie blinkers in a Mustang

Check the tail lights on this '67 - look different? Yep that is a yellow lens where the outside red lenses should be and yes, a yellow blinker is flashing on the left side!


Good old Ebay led me to a new blinker set up for Mustangs to give a new Australian or European tail light arrangement. The set I purchased is from a mob calling themselves The Mustang Project and replaces the blinker unit and the tail light set up completely. Instead of bulbs it uses LEDs which are brighter and more reliable.

I pulled the tail lights and put in the new system, but found it gave spurious results. AAAGH why why why?

Pull out the schematics, what a bloody nightmare . . . after a lot of research I discovered the brakes and the blinkers run a signal up the same wire to the same filament. This is because the Yanks used the same brake light as a blinker. Little wonder so many Mustangs have been shunted up the back, in modern traffic it is very difficult to be sure whether the blinkers are on or not.


The power for the brake lights is routed through the blinker switch. When the brakes are on, the blinker switch disconnects the brake light power to that side and applies the power from the blinker unit.

The Mustang Project lights are set up to work on that wiring arrangement. Problem is, my car has been rewired so a separate brake wire is used, thereby creating two independent wiring circuits for blinkers and brakes. This really screwed me , because I paid a heap of dough for the units and it appeared they could not work, unless I worked out how to the rewire the car's tail lights. Quite frankly, having already replaced the blinker switch in the past, a journey back up the steering column filled me with dread.

Unperturbed I told the guy who sold it to me and he referred me to the Americans who made it. I asked them if it could be modified to suit a separate brake wire set up. They were very helpful and told me that they could rewire it to suit my configuration if I paid the postage. So I sent it away and they did the deed.


This afternoon me and the boy (yes Mother I know it is bad grammar), fitted the new units, after testing they would work of course!

The result is great! We now have yellow blinkers in the tail lights and both the blinkers and brakes are much brighter than the original.

Here's a tip for you, if you buy a set and get them to change to suit your wiring, that has been modified like mine. They don't tell you but the long black crossover wire becomes the brake light wire and needs to be fed through a new hole in the tail light unit, which you need to drill.

The units do not blink with the same rhythm as the old blinkers and they do some strange brake flicking as you change the from left to right. But these idiosyncracies aside, the result is very good. The lights are very bright and unmissable, well done Mustang Project!